Belt conveyors are one of the most widely used bulk material handling systems in industries such as mining, quarrying, cement production, construction aggregates, and mineral processing. They are designed to transport materials continuously with high efficiency and low operating costs.
However, during actual operation, many belt conveyor problems may occur due to improper installation, inaccurate adjustment, insufficient maintenance, or incorrect operation. Among these issues, unexpected shutdowns and conveyor belt deviation (belt misalignment) are two of the most common failures that can seriously affect production efficiency and increase maintenance costs.
A properly installed belt conveyor not only improves transportation performance but also extends equipment service life and reduces downtime. Therefore, understanding the correct installation procedures and effective troubleshooting methods is essential for operators and maintenance teams.
This article introduces five important belt conveyor installation tips and explains five practical methods to solve conveyor belt deviation problems.

The conveyor frame is the foundation of the entire belt conveyor system. Any installation error in the frame structure can directly affect belt alignment, roller operation, and overall equipment stability.
The recommended installation sequence is:
Before installing the conveyor frame, the centerline of the entire conveyor system must be accurately determined. All components, including the frame, rollers, and pulleys, should be installed along the same straight reference line.
During installation, operators should ensure:
For a single conveyor frame section, the centerline deviation should generally be controlled within ±0.1 mm. For the entire conveyor length, the deviation should be less than 35 mm.
After all frame sections are positioned correctly, they can be connected together. A final inspection should be carried out to confirm:
A precise frame installation provides a solid foundation for preventing future belt tracking problems.
The drive unit is the power source of the belt conveyor, and its installation accuracy directly affects operating stability.
During installation, the following points should be carefully checked:
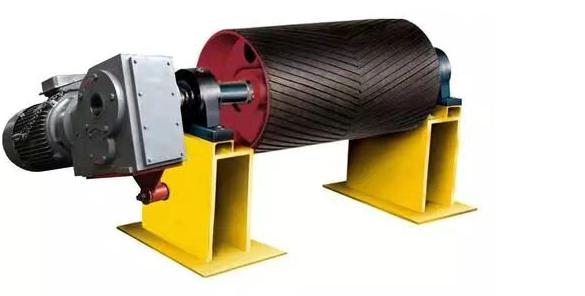
The transmission shaft of the drive pulley should be perpendicular to the conveyor centerline. Meanwhile, the centerline of the conveyor should match the middle position of the drive pulley width.
The drive shaft and reducer shaft should remain parallel to avoid excessive vibration and uneven force distribution.
Before connecting the motor and operating the conveyor, all shafts and pulleys should be leveled properly.
The horizontal deviation of the shaft should normally be controlled within 0.5–1.5 mm.
The tensioning system plays an important role in maintaining proper belt tension. During installation:
Incorrect drive or tensioning installation is one of the main reasons for belt deviation and uneven belt wear.
Rollers are critical components that support the conveyor belt and reduce running resistance. Their installation quality directly influences conveyor efficiency and service life.
After installing the conveyor frame, drive unit, and tensioning system, the next step is installing:
During installation, make sure:
For curved sections of the conveyor, the spacing between roller frames should be reduced. Normally, the spacing should be about half of the standard roller spacing to ensure the belt can smoothly follow the curve.
After installation, check whether all rollers have:
Poor roller installation can cause uneven belt loading and increase the possibility of belt tracking problems.
After the main components are installed, comprehensive inspection and adjustment are required before operation.
The following requirements should be satisfied:
The head pulley, tail pulley, and other direction-changing pulleys should be installed parallel to each other.
Any pulley angle deviation may force the belt to move sideways during operation.
All rollers should remain:
Once the conveyor structure has been fixed on the foundation, feeding devices and discharge chutes can be installed.
Incorrect material feeding angles or uneven loading can also cause belt deviation.
After installing drive pulleys and roller frames, the conveyor should be checked again for:
A detailed inspection before operation can prevent many future failures.
Before putting the belt conveyor into production, an empty running test should always be performed.
During the test, operators should check:
The conveyor belt should run smoothly without moving toward either side.
All rollers should rotate normally without abnormal noise or resistance.
The belt should maintain proper contact with guide plates without excessive friction.
The operating temperature of motors, reducers, and drive components should remain within acceptable limits.
Only after confirming that all parameters meet operational requirements should the conveyor be put into full production.
Conveyor belt deviation is one of the most common problems during operation. It can lead to:
The following methods can effectively solve belt tracking problems.
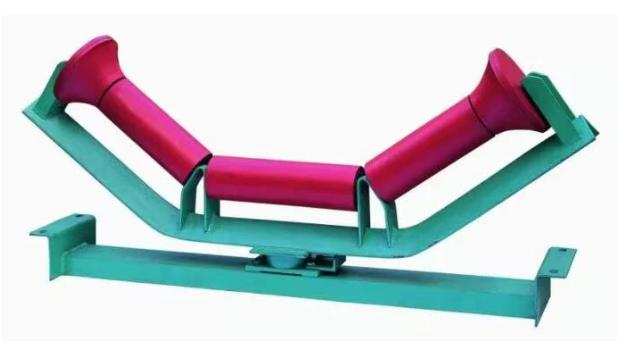
Self-aligning rollers are designed to automatically correct belt movement.
Common types include:
These devices generate a lateral force when the belt moves away from the center, helping the belt return to its normal position.
When adjusting:
This method is especially suitable for:
However, excessive adjustment on long conveyors may increase belt stress and reduce belt service life.
Incorrect belt tension is another major cause of belt deviation.
If the tension is too loose:
If the tension is too tight:
For weight tensioning systems:
For hydraulic or screw tensioning systems:
Proper tension adjustment helps maintain stable belt operation.
For reversible belt conveyors, deviation adjustment is more complicated because the belt runs in both directions.
The recommended adjustment method is:
The main adjustment sequence should be:
For belt vulcanized joints, the belt tension should remain evenly distributed across the entire width.
Uneven pulling force during installation can easily cause permanent belt deviation.
Pulley alignment has a significant influence on belt tracking.
All pulleys should be:
If a pulley is installed at an incorrect angle, the belt will naturally move toward one side.
Adjustment method:
For head pulley deviation:
The adjustment method for the tail pulley is opposite to the head pulley.
When belt deviation occurs in the middle section of the conveyor, adjusting carrying roller groups is one of the most effective solutions.
During manufacturing, roller mounting holes are usually designed as long holes to allow adjustment.
Adjustment steps:
After adjustment, allow the conveyor to run for a period of time and observe the result.
Avoid making large adjustments at once because belt tracking requires gradual correction.
The stable operation of a belt conveyor depends heavily on accurate installation, correct adjustment, and regular maintenance.
From frame installation and drive alignment to roller adjustment and empty running tests, every step plays an important role in improving conveyor reliability.
At the same time, when conveyor belt deviation occurs, operators should identify the root cause instead of making random adjustments. Correctly adjusting self-aligning rollers, belt tension, pulleys, and carrying rollers can effectively restore normal operation.
For mining plants, aggregate production lines, and bulk material handling systems, proper belt conveyor installation and maintenance are essential for achieving higher efficiency, longer equipment life, and lower operating costs.